I had to buy the wool below (50p) and if you look closely at it,
you may understand why!
I have never seen a ball wound this way, so beautifully!
Look closely, have you?
I'm guessing its a particular machine wind, anyone know what it might have been? Its vintage yarn, no label though.

Okay, in the hope this helps any of you who might like to try the textured circle I've made two versions to give you an idea what to do.

Pink fabric block on left above is 7" x 7.5" to give you an idea of scale.
I have drawn round the yoghurt lid on the wrong side of the fabric -
snazzy templates right!
I cut just outside the drawn line on the lower piece of fabric and cut about an inch farther out on the other piece.
The yoghurt lid is 5" across and the inner plastic from some double sided tape is 3" across.

I used the 3" circle and drew round it onto Vilene.
That's the size I am aiming for as a finished circle.

Method 1
- using the slightly smaller cut out fabric circle, running stitch round the narrowly turned over edges and gently pull to tighten.
Don't tie off thread though at this stage so you can ease out the fabric as you stitch.
Locate the edges of it at north, south, east n west points on your Vilene circle and pin into position.
I have pinned about a quarter inch within that drawn circle you'll notice.
Doing it this way is a bit faffy but if your careful, its possible to tease the fabric out and stitch it down as you go round.
You're eyeballing the drawn circle and you stretch the fabric circle edges to fit the shape.

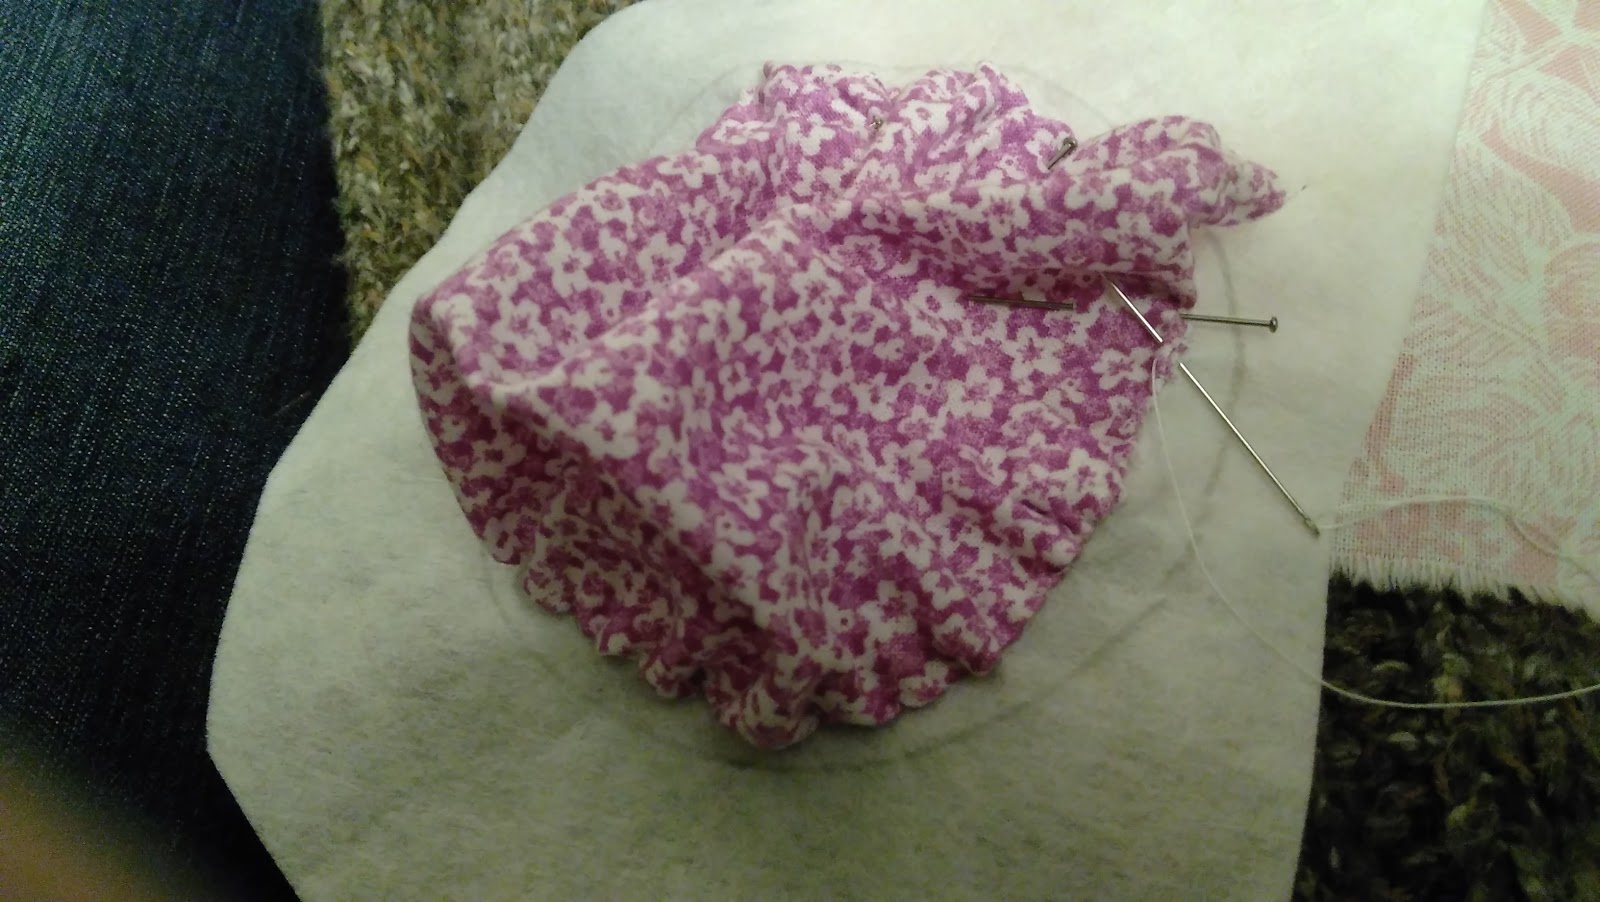
What you end up with is the balloon like 'puff' shape - see below.
Now trim back the Vilene and the puff will sit in your hand, air trapped within it sort of right?

Now stitch the puffy shape onto the backing ..

and you will have this below ..

You can then twerk and tweak the top section or flatten it
and catch stitch it from underneath,
into a pleasing scrunched up finish.

I sort of twirled the centre and then captured that twirl from below with stitches, ending up with this -

Method 2 -
This is the method I prefer, still using a drawn circle on Vilene and in this example, the larger fabric circle.
I have not used any running stitches but have as before
pinned the fabric to the drawn circles edge - north, south, east and west.
I also pinned in between those 4 points as well.
Then I stitched the fabric down, tucking in the edge as I went along and evening out the fabrics flare, so it followed the drawn circle shape.
I manage to get a better shaped circle doing it this way lol

You can see how much extra fabric is in the 'puff' on this one,
so obviously the larger a fabric circle you use, with a smaller base circle, then the more fabric manipulation opportunities you'll have
once its stitched in place.
Follow the same method as before, cutting back the Vilene and stitching it onto your backing and then manipulate the 'puff' to suit yourself.
I twirled the 2nd one into a sort of rose shape and captured the centre section from below.


Hope that's explained it well enough for any of you who fancy making a textured circle, to work out a version for yourself!
I haven't pressed either of the two above, but that would flatten them out more of course and you could then trap them with more stitches from below, like I did with this first one I made.

Looking great, thanks for the instructions....this is where blogging is like popping over for a quick cuppa and a natter about Quilty things....it's great!
ReplyDeletebeautifully done. twerk and tweak....i love that.
ReplyDeleteas far as the ball of yarn...looks like it was wound with a ball winder. it does make a beautiful pattern. that's how i wind the yarn i buy in hanks.
It was fun to see how you make these Lyn, they are very different to anything I have seen before! Lovely! Christine x
ReplyDeleteOh, this is lovely, thanks for the tutorial, am going to have to try this.
ReplyDeleteI do like that wool winding - I've never seen anything like that before. And thank you for sharing how you made your textured circles. They look great :)
ReplyDeleteGreat looking twirked & tweaked circles. A different look to Suffolk Puffs.
ReplyDeleteA few years ago I went to a quilt show in the UK and was intrigued by the number of quilts on show which were textured, with loads of them having folded fabrics. Its not something I have seen much of here. We do art quilts, but not folded fabrics. Your circles would fit in that category.
These look like fun to make and no two would ever turn out the same would they. Would make an interesting quilt for sure.
ReplyDelete